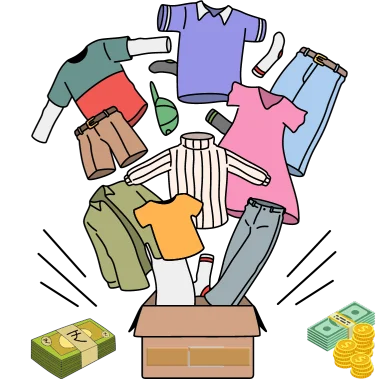
Are you considering starting an online store but don’t want to manage inventory?
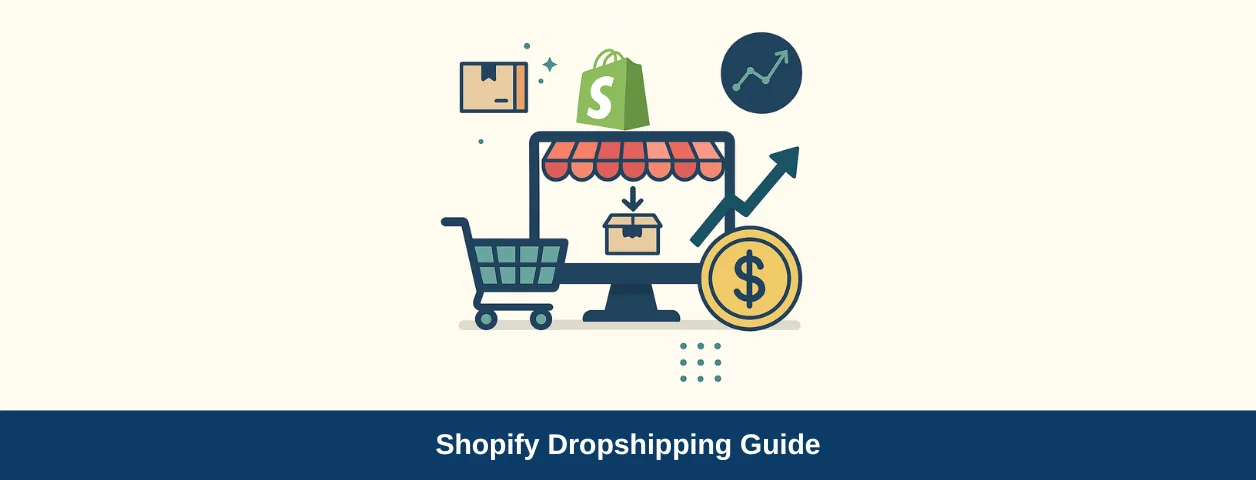
That’s where dropshipping comes in, and Shopify is one of the best platforms to make it happen. Shopify dropshipping enables you to sell products online without maintaining any inventory.
Shopify’s beginner-friendly tools, drag-and-drop store builder, and seamless app integrations make it easier than ever to start, adapting to your needs, even if you’ve never built a website or run a business before.
Whether you’re a student or someone looking for a flexible side hustle, Shopify dropshipping puts success within reach.
Whether you’re entirely new to the concept or just exploring your options, this guide will help you through each step, enabling you to start and grow a profitable dropshipping business.
Can You Make Money Dropshipping on Shopify?
This is the common question everyone asks. The answer is yes, and it requires effort, innovative strategies, continuous learning, and a bit of patience. Your success hinges on how effectively you manage your costs, price your products, and grow your operations.
How Does Dropshipping Works on Shopify?
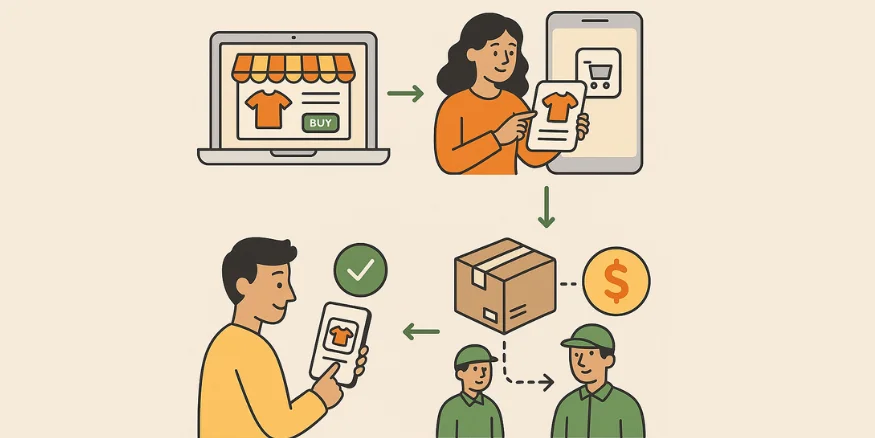
- You set up an online store on Shopify.
- You use a dropshipping app to add products from suppliers to your store.
- A customer places an order on your Shopify store.
- The order is automatically forwarded to the supplier, who prepares and ships the product directly to the customer.
- You earn a profit on each order. This means you don’t need a warehouse, packing materials, or a shipping team. Everything is handled behind the scenes, allowing you to focus on marketing, customer service, and growing your business.
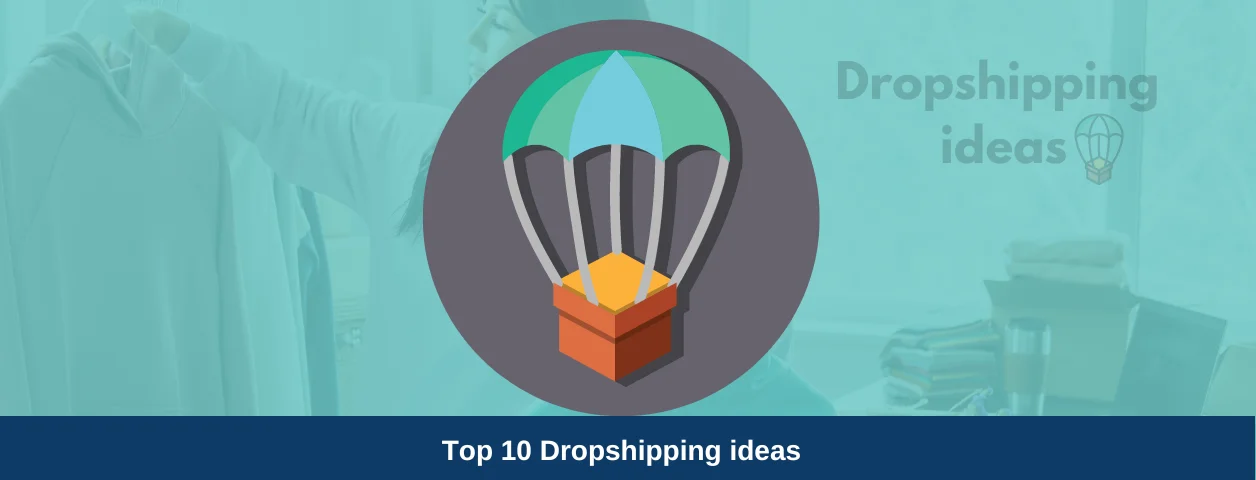
How to Start Dropshipping on Shopify? ( Step-by-Step Guide)
Ready to build your first dropshipping store?
This section covers everything you need to know about starting dropshipping on Shopify. With Shopify’s free trial and free-to-use apps, you can get started with minimal risk.
Whether you’re just getting into dropshipping 101 Shopify or already have a product niche in mind, these steps will guide you through the entire process.
1. Niche Selection & Finding Your Profitable Product:
Before thinking about starting your store, you need to decide what you’re going to sell. This is called niche selection.
Think about:
- Passions & Interests: What do you genuinely enjoy or know a lot about? Selling something you’re passionate about can make the journey more authentic.
- Problem-Solving Products: What common problems can your products solve for customers? Products that offer solutions often have strong demand.
- Trends: Are there any rising trends you can jump on? Identifying a trend early can lead to rapid sales growth.
- Profit Potential: Are the products generally priced high enough to give you a good profit margin after all costs (product, shipping, marketing)?
How to find trending products and identify high market demand (Free Tools)
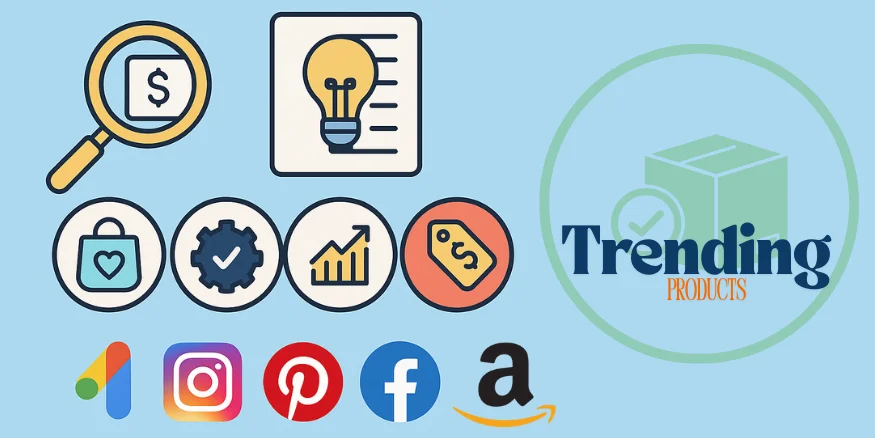
Finding a dropshipping product that people want to buy is half the battle. Here are some simple ways to figure out what’s in demand:
- Google Trends: This is a free tool that helps you find trends. Type your product ideas or keywords related to your niche. You can see how search interest has changed over time. Look for keywords with an upward trend or consistently high search volume. You can even compare multiple keywords to see which one has more interest.
- Social Media Exploration: This is a goldmine for viral products. See what people are enthusiastically sharing and buying.
- Instagram & Pinterest: Look for popular hashtags related to products or interests. What are influencers showcasing? What images are getting a lot of saves and shares?
- Facebook Ad Library: While more advanced, you can view the ads that competitors are running and the products they’re promoting. This gives you insight into what might be working for them.
- E-commerce Best-Seller Lists: Check out Amazon’s best-seller lists in various categories. These are products that are already selling well.
- AliExpress Dropshipping Centre: This free tool from AliExpress displays popular products, trending items, and sales data, which can be very helpful for identifying trending niches.
By using these free methods, you can make informed decisions to select products that have a real chance of selling and help you generate profits dropshipping on Shopify.
📌 Check out the following:
1. Best Dropshipping Products To Sell Online
2. Dropshipping Beauty Products: Makeup, Skincare & Suppliers
2. Setting Up Your Shopify Store

Step 1: Sign Up for Shopify
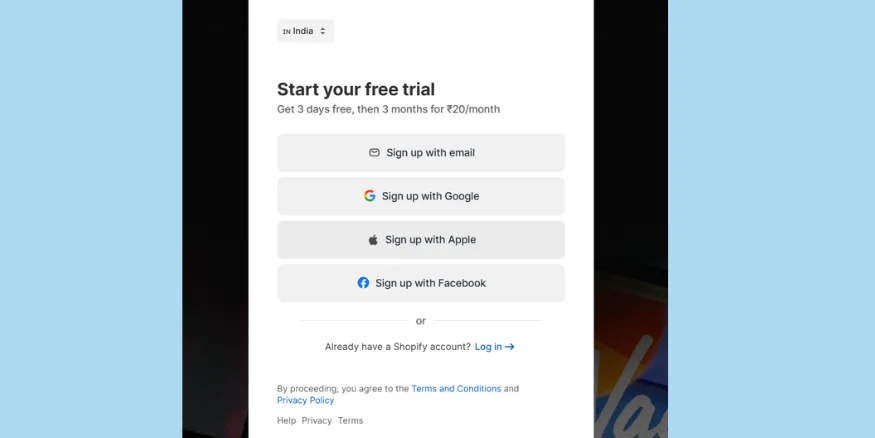
Go to Shopify’s website and click “Start for Free” You will be asked to sign up using your email address.
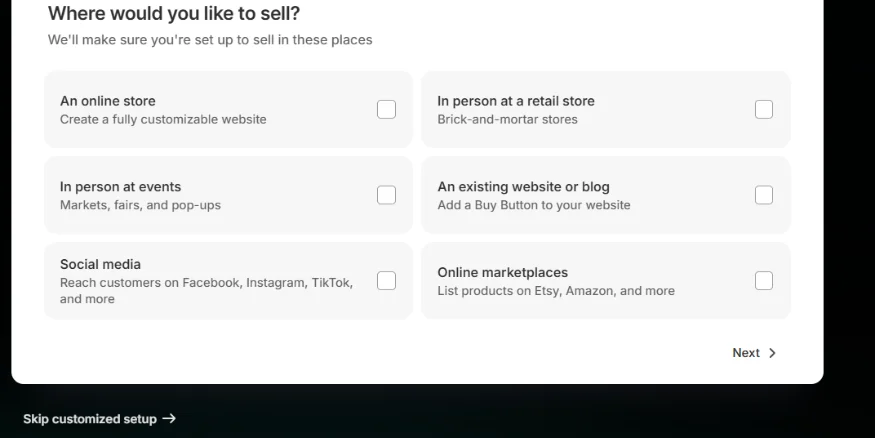
Shopify will then ask you a series of quick questions about your business to tailor your experience. Don’t worry if you don’t have all the answers yet; you can usually select ‘Skip customised setup’ or change these details later in your admin settings.
After completing the process, the system will direct you to your Shopify admin dashboard. Your free trial will begin immediately.
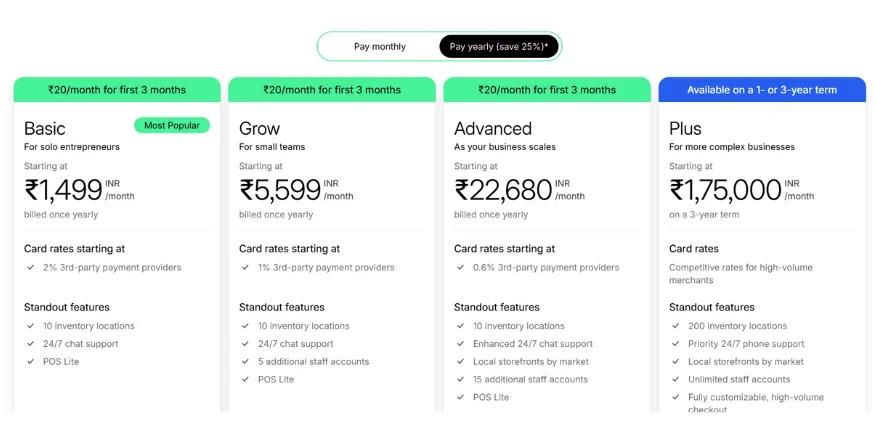
Additionally, consider exploring other Shopify plans. Shopify offers various tiers, starting from the very affordable Basic plan to the Grow and Advanced plans, which feature increasing capabilities and lower transaction fees.
Each plan offers different business needs and growth stages. You can find detailed comparisons on Shopify’s official website to choose what fits your budget and goals.
Step 2: Choose a store name
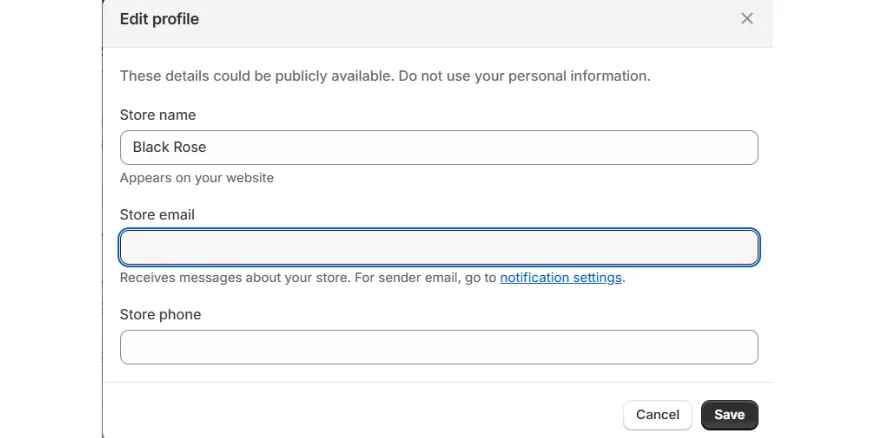
This is one of your first big branding decisions! Your store name is how customers will remember you.
- Catchy and Memorable: Easy to recall and share with friends.
- Relevant to your niche: It should give customers an idea of what you sell.
- Short and Simple: Easier to type into a browser and for social media handles.
- Unique: Check if the domain name is available. You don’t want to confuse customers with another business. You can check domain availability directly within Shopify’s settings or using online domain checkers.
Step 3: Basic Setup
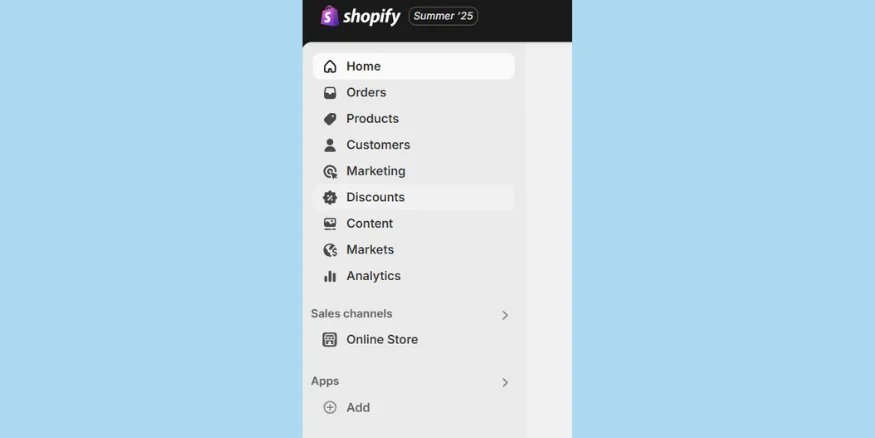
Once inside your Shopify admin, take a moment to explore. The left-hand sidebar is your navigation panel. You’ll see options for:
- Home: Your main dashboard with tasks and insights.
- Orders: Where you’ll manage incoming sales.
- Products: Where you’ll add and organise your items.
- Customers: Your customer list.
- Analytics: Track your store’s performance.
- Marketing: Tools for promotions.
- Discounts: Create sales and special offers to drive revenue growth.
- Online Store: This is where you manage your theme, blog posts, pages, and navigation.
- Apps: Where you’ll add extra features and integrations.
- Settings: Crucial for setting up payments, shipping, legal policies, and more.
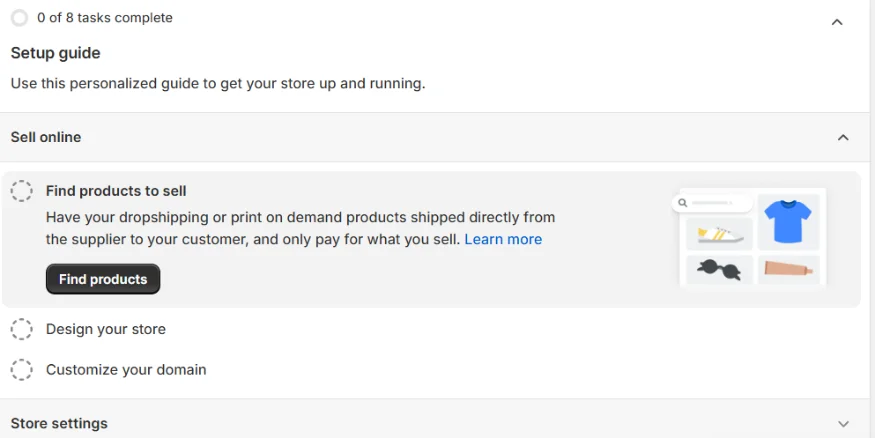
Shopify provides a helpful “Setup Guide” on your home screen to walk you through the essential steps to get ready for launch. Primarily, it helps beginners avoid feeling pressured to do everything at once.
Step 4: Pick a Theme
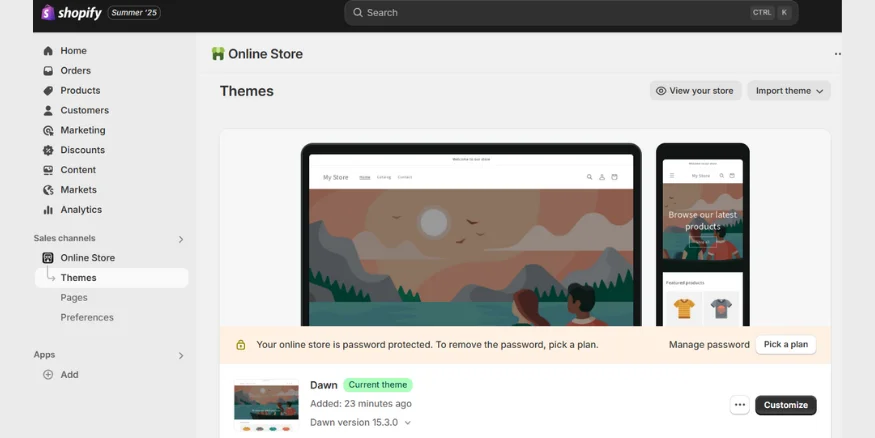
It’s a visual identity and acts as a storefront window and interior design for your dropshipping business. A good theme makes your store look professional and easy to use.
To find themes, go to Online Store > Themes in your Shopify admin.
You’ll see your current default theme. To find others, click Visit Theme Store.
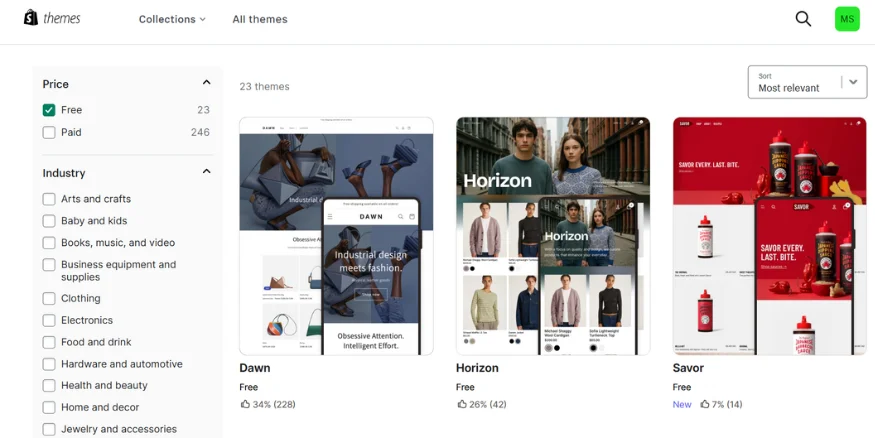
The Shopify Theme Store offers a wide variety of themes, and the best free themes include Dawn, Spotlight, and Sense.
Step 5: Customising Your Theme
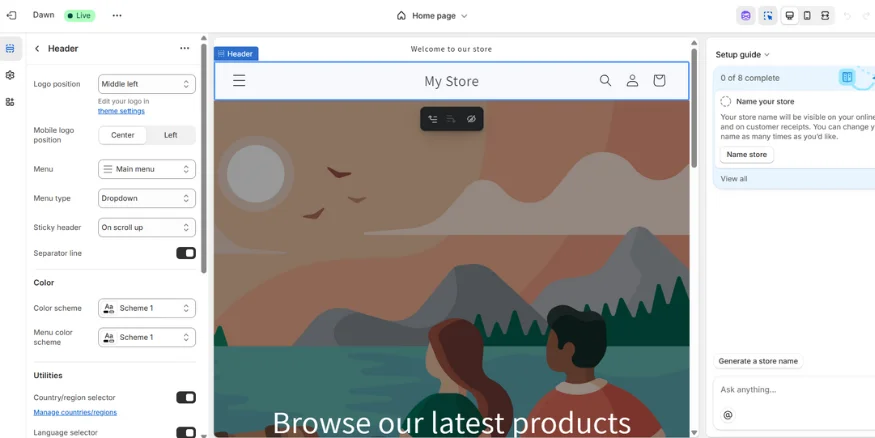
Click the Customize button next to your chosen theme. This opens the theme editor, a drag-and-drop interface where you can:
- Add your logo: Upload your brand’s logo.
- Change colours and fonts: Match your brand’s aesthetic.
- Rearrange sections: Move blocks of content (such as image banners, product grids, and testimonials) up and down your homepage.
- Add images and text: Populate your store with your content.
You can toggle between desktop and mobile views within the editor to ensure your design looks great on both platforms.
- Select a theme that aligns with your product’s style.
- Look for features like quick buy, reviews, video sections, or Instagram feeds.
- Most shoppers use mobile devices, so ensure the theme looks great on phones.
- For paid themes, choose one with solid reviews and responsive developer support.

3. Product Sourcing & Supplier Integration for Shopify Dropshipping
To use dropshipping on Shopify, you need to connect with suppliers through apps. This is where you truly understand how to do dropshipping on Shopify from a product perspective.
Best Dropshipping Apps for Shopify
Shopify’s App Store is packed with tools to help you find and import products quickly and easily. These apps are crucial for using dropshipping on Shopify. These apps streamline the process of finding products and getting them listed on your store.
📌 Check out our ‘Best Dropshipping Apps for Shopify’ guide to learn about more apps and how they work. Here are some of the best dropshipping apps, including Qikink, DSers, Zendrop, Spocket, and more.
Your suppliers are the backbone of your business. Look for:
- Good Reviews: Check what other dropshippers say about them.
- Clear Shipping Times: Know how long it will take for products to reach your customers.
- Quality Products: Order samples yourself to ensure the product meets your standards.
- Good Communication: You’ll need to communicate with them, so responsiveness is key.
How to Import Products
Once you’ve chosen an app and found products you like, importing them to your Shopify store is often just a few clicks.
Here, we take Qikink as an example to show you how easy it is to import products to your Shopify store, streamlining your dropshipping setup in just a few simple steps.
Step 1: Access the Qikink App on Shopify

Go to Apps on the left sidebar of your Shopify admin and search for “Qikink Print on Demand” in the Shopify App Store.
Step 2: Install the Qikink App:
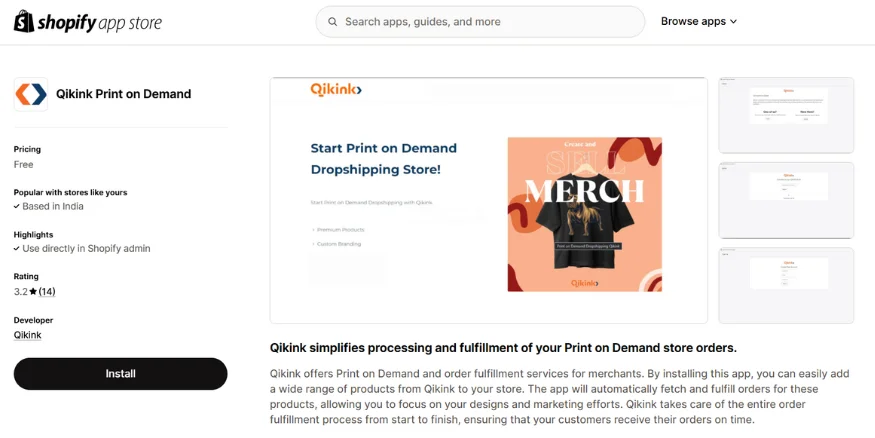
- On the Qikink App page in the Shopify App Store, click the “Add app” button.
- Shopify will request your permission to install the app and grant it the necessary access. Review these permissions and click “Install.”
Step 3: Connect Your Qikink Account (from within the app):
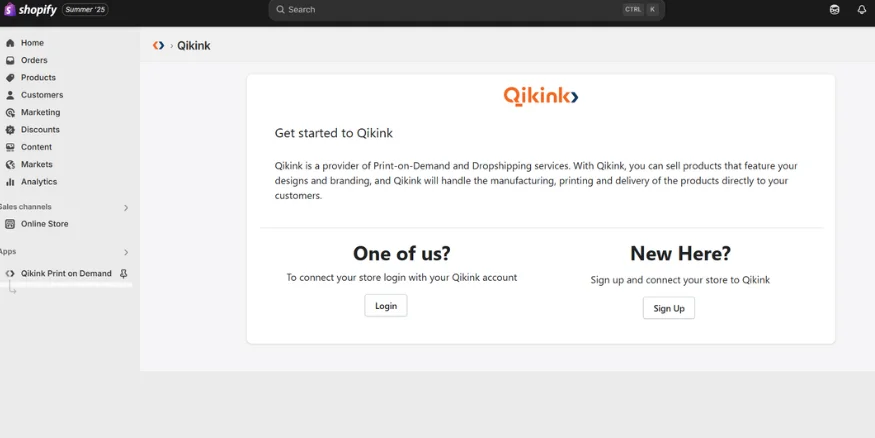
- After installation, the Qikink app will open within your Shopify admin.
- Log in to your existing Qikink account or sign up for a new one if you don’t have an account yet.

- When logging in, you typically enter your Qikink username or email ID. Qikink will then send an OTP to your registered email address for verification. Enter the OTP in the app to finalize the connection.
Step 4: Import Products from Qikink to Shopify
- Once your accounts are linked, you can start adding products to your store. This process involves creating or customising the product in the Qikink dashboard and then pushing it to Shopify. Next, Log in to Your Qikink Dashboard.
- Next, Navigate to the “Products” or “Add Product” section in your Qikink dashboard.
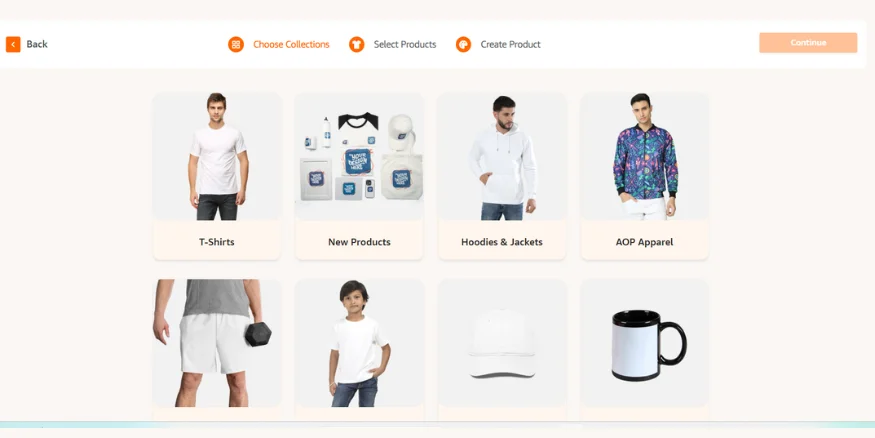
- Select Product Type: Choose the base product you want to sell, such as a T-shirt, hoodie, mug, or phone case.
- Select Variants: Choose colours, sizes, and other options.
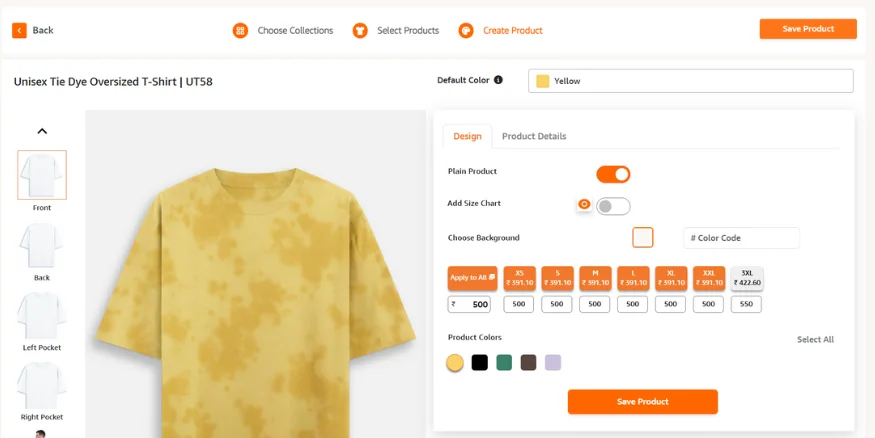
- Upload Your Design: If it’s a print-on-demand product, upload your design files to ensure they meet Qikink’s specifications for resolution format or select plain products.
- Place Design: Position your design on the product mockup.
- Generate Mockups: Qikink will create realistic mockups of your product based on your design and save them for you.
Understanding Profit Margins in Dropshipping
Your profit is the difference between your selling price (what the customer pays you) and your total costs (everything you pay to produce the product, deliver it to the customer, and attract that customer).
The formula is simple:
Profit = Selling Price – (Product Cost + Shipping Cost from Supplier + Marketing Costs + Shopify Fees + Other Overheads)
Pricing Strategies for Success
Setting the right price is a delicate balance. You want to be competitive enough to attract buyers but not so high as to compromise profitability.
- Search for the exact or similar products that you’re dropshipping. Compare the prices charged by other stores, especially other drop shippers and large retailers like Amazon or Flipkart.
- Being the cheapest isn’t always the best strategy. Customers might assume lower quality. Aim for competitive but profitable.
Psychological Pricing:
- Ending with 99 or 95: Prices like ₹999 or ₹1,495 tend to make products seem cheaper than ₹1,000 or ₹1,500, respectively. This is a classic retail tactic that remains effective.
- Now, Smart Sellers Are Pricing at ₹990 or ₹995. Here’s why it works: ₹999 feels too familiar, Slight drops look more transparent.
- Price Anchoring: Display a higher “original price” that’s crossed out next to your actual selling price. This makes your price look like a great deal (for example, Was: ₹2,000, Now: ₹1,499).
Bundle Deals:
- Encourage More Sales: Offer discounts when customers buy multiple items, for example, “Buy 2, Get 10% Off.”
- Complementary Products: Bundle products that naturally complement each other. This increases the total value of each order, directly boosting your overall profit.
Struggling to set the right price?
Use our Dropshipping Profit Margin Calculator to clearly understand your profits, refine your pricing strategy, and plan more effectively for long-term business growth.
- Set Selling Price: Qikink will typically show you the base cost. You’ll then enter your desired selling price for the product on the same dashboard.
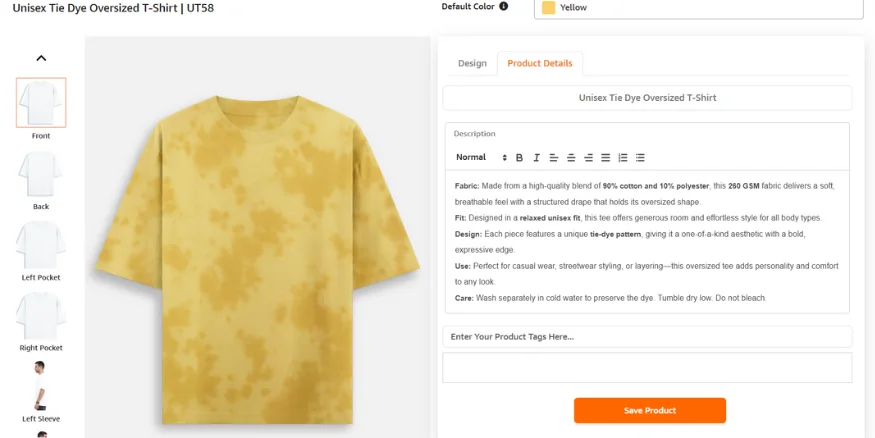
- Product Details: You can edit details such as the product title, description, images, and pricing to make them unique to your brand. You can easily update these details in the “Product details” tab next to the Design tab. Don’t forget to click the “Save Product” button to apply your changes.
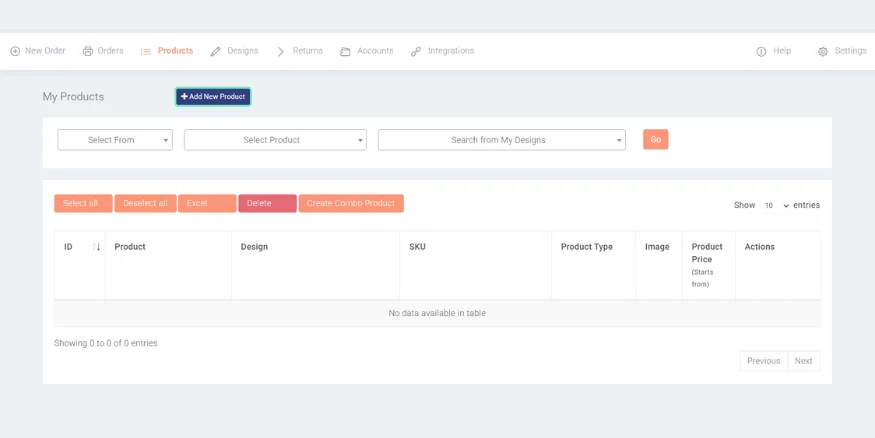
Step 5: Push Product to Your Shopify Store
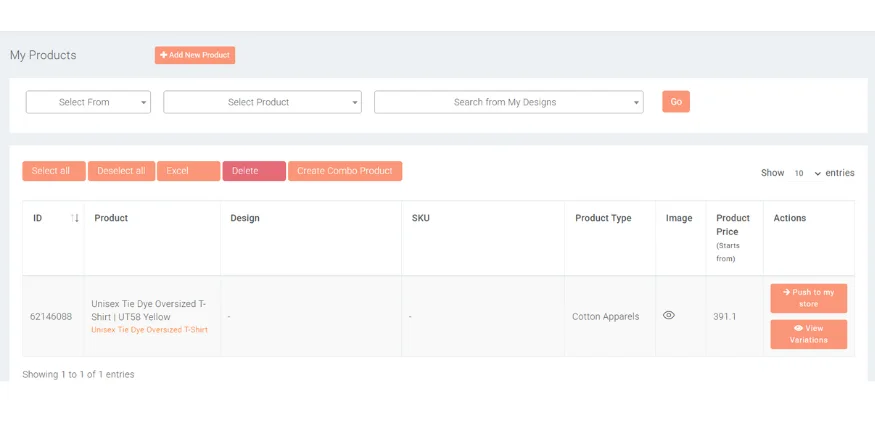
- Go to your “My Products” section in the Qikink dashboard. Choose the specific product you wish to push to your Shopify store.
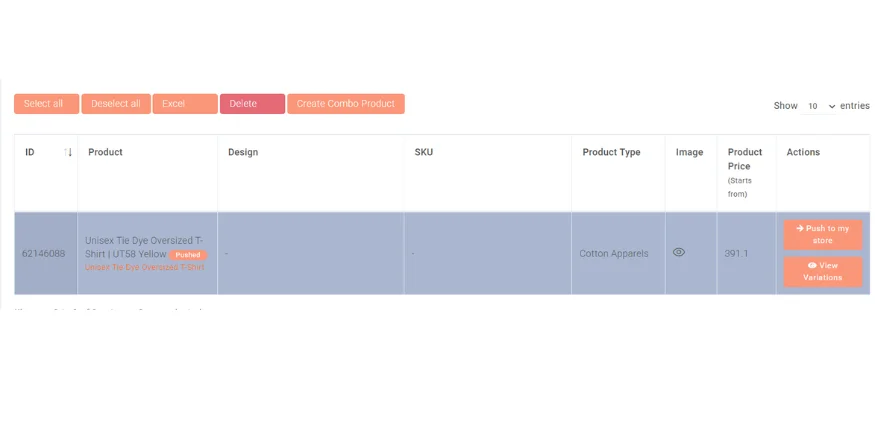
- Click “Push to my Store” You will then have the option to push the selected products to your connected e-commerce store.
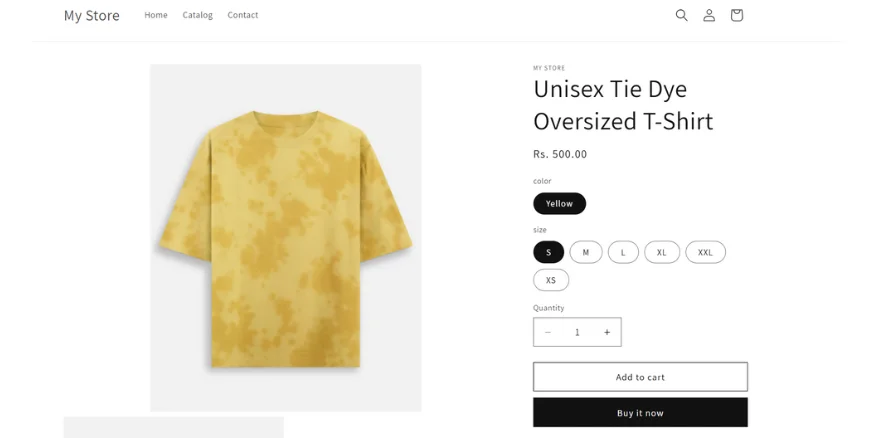
- Once these steps are complete, your Qikink products will be available on your Shopify store and ready for customers to purchase. Qikink will then handle order fulfilment automatically when an order is received.
Check out Qikink’s ultimate guide on how to create and push products to your Shopify store?
4. Building & Optimising Your Shopify Dropshipping Store
Your store needs to look good and function well to convince customers to make a purchase.
Designing a High-Converting Store

A good design isn’t just about looks; it’s about making it easy for customers to find what they need and complete a purchase.
- Clean Layout: Avoid clutter. Make sure product images are prominent.
- Intuitive Navigation: Customers should easily find categories, search bars, and their cart.
- Brand Consistency: Utilise consistent colours, fonts, and imagery that accurately reflect your brand’s personality.
Creating Compelling Product Pages
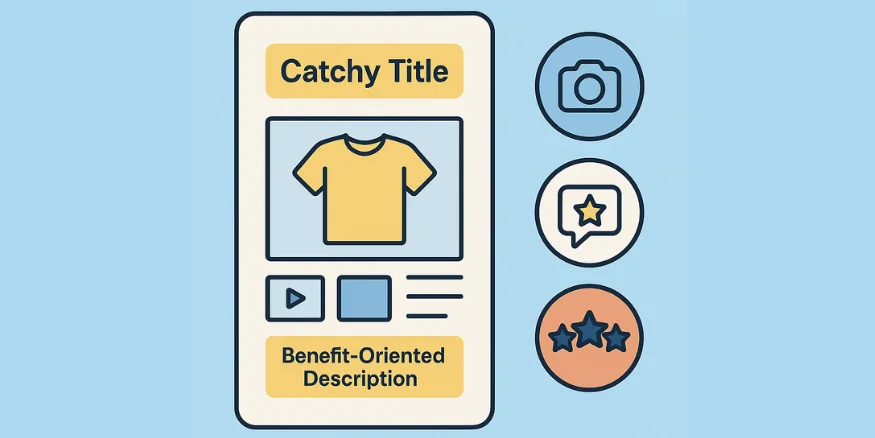
Your product pages are where the magic happens.
- Catchy Titles: Use keywords that clearly describe the product.
- Benefit-Oriented Descriptions: Don’t just list features; explain how the product benefits the customer.
- High-Quality Images & Videos: Showcase your product from every angle. Videos can significantly boost conversions.
- Customer Reviews: Displaying reviews builds trust and social proof.
Essential Tools for Dropshipping Success
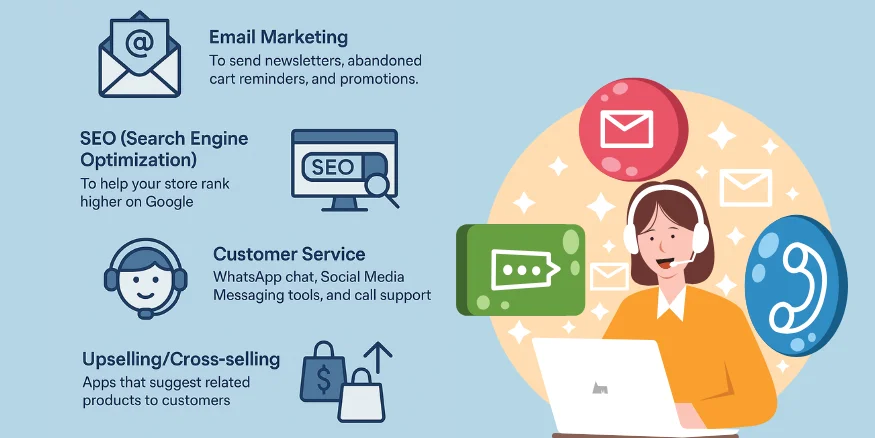
Beyond dropshipping apps, consider others for:
- Email Marketing: To send newsletters, abandoned cart reminders, and promotions.
- SEO (Search Engine Optimisation): To help your store rank higher on Google.
- Customer Service: WhatsApp chat, Social Media Messaging tools, and call support.
- Upselling/Cross-selling: Apps that suggest related products to customers.
Elevate your offering with the latest trendy t-shirts from Qikink

5. Order Fulfillment & Customer Service in Shopify Dropshipping
Once sales start coming in, you’ll need a smooth process for getting products to customers.
How to Fulfil Dropship Orders on Shopify
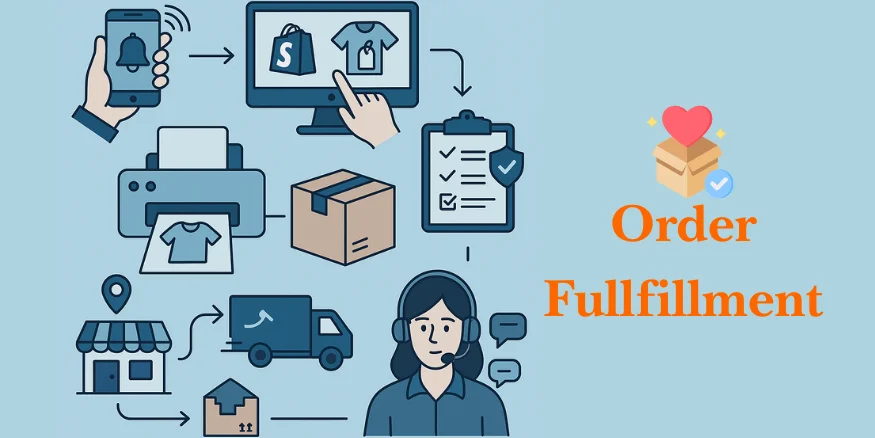
This is where dropshipping fulfilment with Shopify comes into play. When a customer buys from you:
- Order Notification: You get an order notification in your Shopify admin.
- Automated Order Fulfilment: All orders are automatically processed when integrated with Qikink. You don’t have to do it manually.
- Tracking Information: Once the supplier ships the product, they provide a tracking number, which you then pass on to your customer.
- Be upfront about your shipping times, especially if products are coming from overseas.
- Clearly display your shipping policy on your store. For returns, have a clear, easy-to-understand policy.
- Since you don’t hold inventory, returns often go directly back to the supplier, but you’ll manage the communication with your customer.
Did you know?
With Qikink, you receive zero RTO charges on your dropshipping orders, plus exclusive discounts and cashback offers that effortlessly boost your profit margins.
Start smarter, scale faster, with perks that genuinely make a difference
Providing Excellent Customer Support
Although the supplier handles shipping, you are the customer’s primary point of contact. Respond quickly to inquiries, handle issues professionally, and seek positive outcomes. Good customer service builds trust and repeat business.
6. Marketing Your Shopify Dropshipping Business
Your store is ready, products are listed, and payments are set up. But here’s the truth: a store with amazing products won’t generate sales if no one knows it exists. Marketing is the most effective way to drive traffic and convert visitors into paying customers.
How To Driving Traffic to Your Store?
Getting potential customers to discover your store is your primary marketing strategy. Here’s how to get eyes on your products:
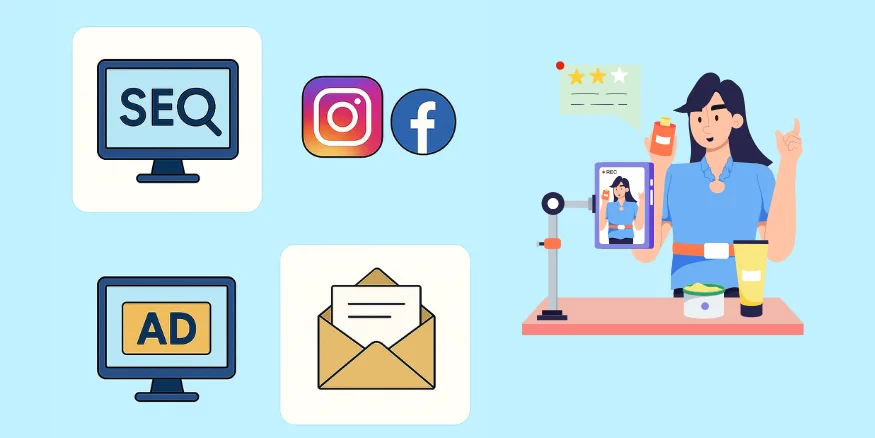
1. SEO (Search Engine Optimisation):
Optimise your store and product pages to improve their visibility in Google searches.
How to do it:
Keyword Research: Use tools like Google Keyword Planner (free), Semrush, or Ahrefs (paid) to find what words and phrases people are searching for. Target keywords with good search volume and relatively low competition.
2. Social Media Marketing:
Use platforms like Instagram and Facebook to showcase your products and engage with potential customers.
Use Content Strategy: Don’t just post product images. Create engaging content like:
- Behind-the-scenes glimpses.
- User-generated content (customers using your products).
- “How-to” videos or tutorials.
- Polls, Q&As, and interactive content to boost engagement.
- Consistency is Key: Post regularly to stay top of mind.
3. Paid Advertising:
Investing money in display ads to a specific audience on various platforms. This can bring quick, highly targeted traffic to your store.
Facebook Ads, Google Ads, and TikTok Ads can quickly bring targeted traffic to your store, though they require a budget.
Budget & Testing: Start small, test different ads and audiences, and only increase your budget on campaigns that show a positive return on ad spend (ROAS).
Want to create high-converting ad campaigns for your dropshipping store?
📌 Check out our detailed guide on Dropshipping Ads & Advertising, packed with proven strategies to help you attract the right audience and grow your sales faster.
📌 Also, check out Best Spy Tools For Dropshipping To Analyze Fb Ads, Website, SEO & More
4. Influencer Marketing:
Partnering with social media personalities who have an audience that aligns with your niche. Their recommendation can introduce your product to a large, engaged following.
How to do it:
- Find Relevant Influencers: Look for influencers whose content and audience align closely with your products and services. Don’t just go for the most prominent names; sometimes, micro-influencers (with 10K-100K followers) have more engaged and niche audiences.
- Collaboration Types: This could involve sending them free products for review, paying them for sponsored posts or videos, or setting up an affiliate commission where they earn a percentage of sales they drive.
5. Building Customer Trust & Loyalty
Beyond making that initial sale, the real long-term success of your dropshipping business comes from turning one-time buyers into repeat customers and brand advocates. Here, we outline the steps to follow.
- Collect Reviews: Encourage customers to leave product reviews.
- Offer Great Support: As mentioned, good service makes customers feel valued.
- Email Marketing: Send promotions, new product alerts, and helpful content to your email list.
Scaling Your Shopify Dropshipping Business
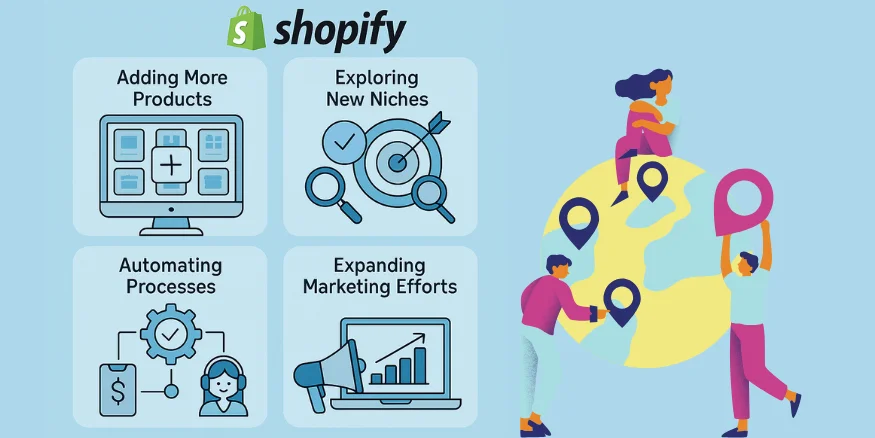
Once you’re making consistent sales, you can scale up by:
- Adding More Products: Expand your product catalogue within your niche.
- Exploring New Niches: Once you master one, try another.
- Automating Processes: Use apps and virtual assistants to handle repetitive tasks.
- Expanding Marketing Efforts: Invest more in successful advertising campaigns.
Automating Processes: Work Smarter, Not Harder
- Order Fulfilment Automation: Most dropshipping apps enable one-click or fully automated order placement with suppliers once a customer purchases from you. This is essential as order volume increases.
- Inventory Sync: Ensure your app automatically updates stock levels on your Shopify store to prevent selling out-of-stock items.
- Email Automation: Set up automated email sequences for abandoned carts, order confirmations, shipping updates, and review requests
- Customer Service: As your customer inquiries grow, consider using AI chatbots for frequently asked questions or help desk software to manage tickets efficiently.
- Virtual Assistants: Hire VAs to handle repetitive tasks such as customer service, basic product research, social media scheduling, or data entry, thereby freeing up your time for strategic growth.
Conclusion
Shopify dropshipping offers one of the easiest and most flexible ways to start an online business, eliminating the need for inventory, shipping infrastructure, or a large budget.
Whether you’re looking for a side hustle or aiming to build a full-time eCommerce brand, this model allows you to launch quickly, test ideas, and scale with confidence.
We’ve covered everything from how to start dropshipping on Shopify to selecting the right theme, sourcing products, fulfilling orders, and understanding what it takes to make a profit.
Start your Shopify dropshipping journey with Qikink, and we offer seamless integration with Shopify, fast fulfilment, and the support you need to grow confidently. Let Qikink handle the backend so you can focus on building your brand.
Read More
Frequently Asked Questions
Do you need a business license to dropship on shopify?
In India, you don’t need a specific “dropshipping license” to start selling on Shopify. However, to operate legally, you must register your business and obtain a GST number, especially if your annual turnover exceeds ₹40 lakhs (for goods in most states). These requirements may vary by location, so it’s essential to stay updated with the latest regulations.
👉 Check out Qikink’s Dropshipping Legal Requirements blog for more details.
How much money can you make dropshipping on shopify?
You can make anywhere from ₹0 to several lakhs per month dropshipping on Shopify in India.
New dropshippers typically start at ₹5,000 – ₹20,000 per month, while experienced ones can reach ₹1,00,000+ per month. Success depends heavily on your niche, product selection, marketing, and operational efficiency, with profit margins typically ranging from 15% to 30%.
Which platform is best for dropshipping?
Several platforms are available for dropshipping, including Shopify, WooCommerce, and Wix. However, when it comes to Indian fulfilment with fast shipping, reliable support, and print-on-demand and dropshipping capabilities, Qikink stands out as the best.
It offers seamless Shopify integration, automated order processing, hassle-free inventory management, and a wide range of on-demand products, making it the ideal platform for both beginners and growing brands.
Does Shopify dropshipping work in India?
Yes, Shopify dropshipping works very well in India. You can set up a store, use local suppliers like Qikink, and sell across India or even globally. With the right products and marketing, it’s a great low-investment business model.
👉 Partner with Qikink for seamless Shopify dropshipping in India.